This guide walks you through adding an interactive element to your Webflow website: videos that play when you hover over them. This technique enhances your website's visual appeal, grabs user attention, and creates a more engaging experience.
Benefits of Play Video on Hover
- Engaging User Experience: This feature adds a dynamic and interactive element to your website, captivating user attention and enhancing their experience.
- Improved Design: Play Video on Hover can visually enhance your website and add a touch of professionalism to your content presentation.
Step-by-Step Guide:
1. Adding the Script:
- Navigate: In your Webflow editor, go to the Pages section on the left panel. Alternatively, press "P" on your keyboard for a shortcut.
- Select Page: Choose the page where you want to implement the video hover functionality. Click the settings icon next to the page name.
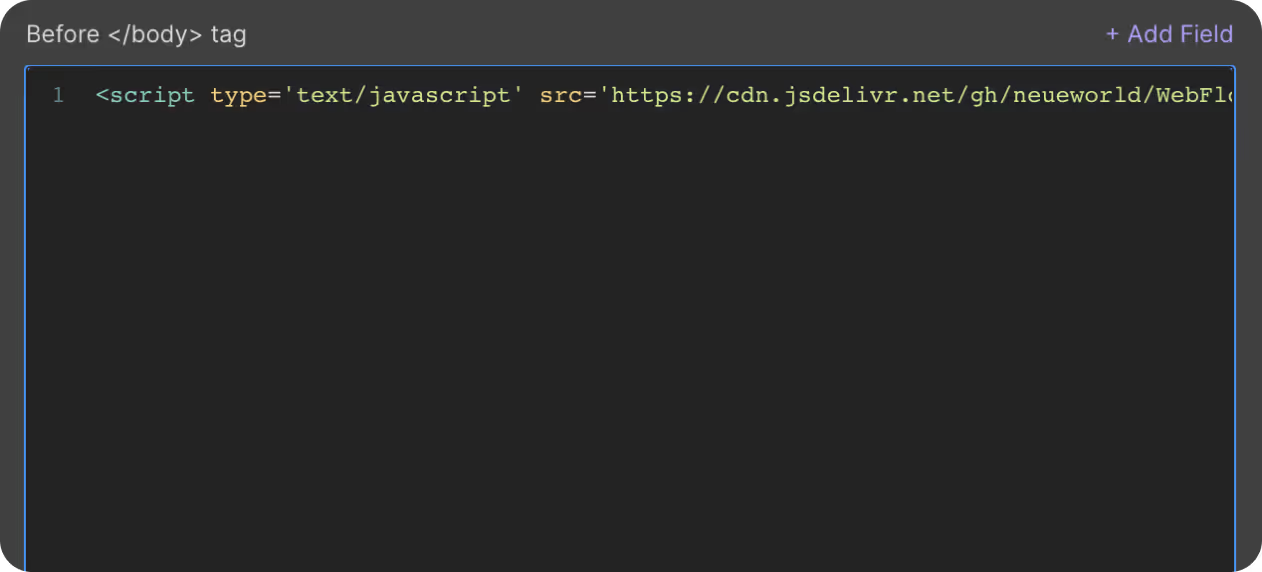
- Paste the Script: Scroll down to the "Before </body> tag" section and copy and paste the script provided by your Play Video on Hover tool.
- Save: Click "Save" to finalize adding the script.

2. Uploading Your Video:
- Add Video Element: On your Webflow page, add a Background Video element.
- Upload Video: Click "Upload" and choose your desired video file (recommended format: .mp4).
- Publish: Once uploaded, publish your site to a temporary staging environment.
3. Inspecting Your Page:
- Open Staging Link: Access your website's staging link.
- Inspect Element: Right-click anywhere on your website and select "Inspect" (or use the keyboard shortcuts: Cmd+Shift+C on Mac, Ctrl+Shift+C on Windows).
- Locate Video Element: In the opened developer window, switch to the "Elements" tab. Find and click the video element on your webpage.

Find your video element. In your elements tab, look for the video URL.

4. Adding Embed Code and Classes:
- Add Div and Embed: Within the page editor, add a Div block and place an Embed element inside it.
- Paste Embed Code: Replace the content of the embed element with the following code, ensuring to replace "url" with the actual URL of your videofound in step 3:
<div class="hover_video_wrapper"><video class="video" loop preload="yes" muted width="100%" ><source src="url" type="video/mp4"></video></div>
Class Breakdown:
hover_video_wrapper: This class identifies the div block containing the video embed.video: This class applies to the embed element itself.


6. Delete Background Video:
Once you've added the embed code, you can remove the previously added background video element as it's no longer needed.
7. Publish Your Site:
Finally, publish your website to make the changes live. It's recommended to test the functionality on different devices to ensure everything works as intended.
Additional Notes:
- The provided script might need slight adjustments depending on your specific Play Video on Hover tool.
- Feel free to customize the appearance of the video hover element using Webflow's styling options.
By following these steps, you can successfully implement the Play Video on Hover functionality and enhance your Webflow website's interactivity and user experience.
Get exclusive access
By subscribing, you'll stay ahead of the curve and gain valuable insights into cutting-edge WebFlow techniques.


